
VitaminBW: a Steady Path to Black-and-White
Black-and-white is pleasure and pain for any photographer – even those who don’t actually use it. About six months ago I stumbled into an interesting technique to convert a color image to B&W and wrote an article about it: it was Gorman-Holbert’s method. Such article spawned two more, one of which further expanded this technique.
I am not surprised that such articles gathered attention: in the middle of the digital rage, B&W photography is still a hot subject. The paradox that forces anyone taking digital pictures to actually shoot in color is well-known and has to do with the Bayer filter living before the sensor – unless the photographer is the happy owner of a Leica Monochrom. Whatever B&W version is built from the channels of a color image which we will consider RGB for the sake of simplicity. This has some advantages, the most important being that we have control over which channel(s) will be used as the basis for our version. It’s like having three different B&W shots of the same scene available, taken through a red, green and blue filter in front of the lens, respectively. Yet this spawns some problems, too: the traditional workflow inherited from analog photography must be revised because of the new technology. Nothing too bad, of course, but it seems there is a missing link with the past. In the age of film, the choice of brand, type and sensitivity, shooting technique, development and printing were the four essential steps towards the final result. This can’t be done today, unless we want to emulate the process with specialized third-party plug-ins which are not necessarily easy to operate.
As an aside, I’ve never made a mystery to prefer Photoshop to Lightroom. Up to a certain point I couldn’t quite grasp the reason why many photographers seemed to prefer to work with a software with good capabilities, yet often lesser than those offered by the flagship Adobe Photoshop. I got to understand it thanks to some thoughts shared with Roberto Bigano, a well-known photographer from Verona. He insists that the tools of the trade should be made “by photographers, for photographers”. In other words, no complications, a transparent process which is easy to both understand and fit onto individual needs. Lightroom certainly goes in such direction, compared to Photoshop – little doubt about it. Bigano is likely to be right, although he uses more Photoshop than any other software, as a pro.
It isn’t therefore surprising that Roberto became an enthusiastic promoter like the well known ALCE written by Davide Barranca: aborigene-proof interface, absolute simplicity of use, stunning results. It is even less surprising that at some point Bigano’s attention was drawn to B&W because
I got angry. I was trying out some apps to convert to B&W and found them too heady, in general, with control panels looking like a Boeing 747. They weren’t certainly designed by photographers for photographers.
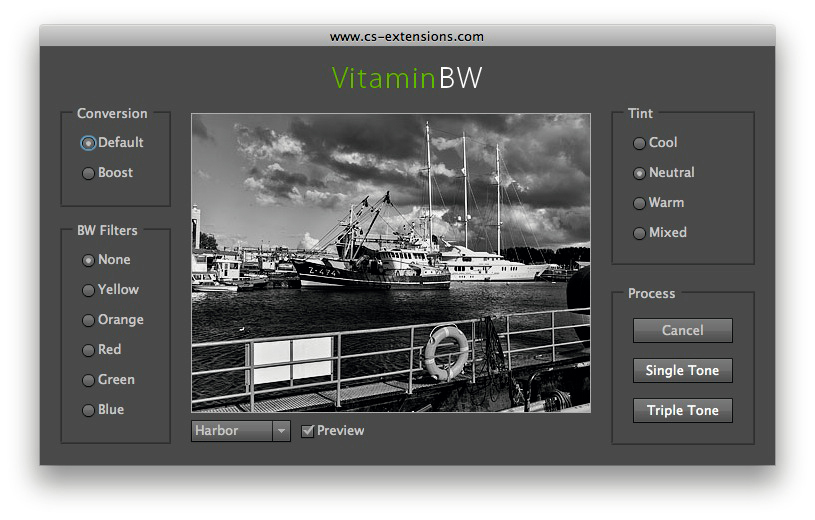
The easy VitaminBW interface.
That’s how the VitaminBW script came about, coded as always by the faithful Davide Barranca. Roberto told me about his idea around the end of October 2013, one day when I was visiting him in Verona. He was very happy about the development of his idea and showed me some of the techniques he was working on. The results were encouraging, and in some cases quite unbelievable. A few weeks ago the script appeared in its finished form, version 1.0.
If you want to read something about VitaminBW in the words of its own coder, you may find a quick explanation of its features here. A more in-depth analyisis with several examples can be found here. VitaminBW is easier to work than explain, though. The interface is very clean: two base conversions (Default and Boost), six filters to emulate the old colored filters used with panchromatic film (None, Yellow, Orange, Red, Green, Blue), four toning options (Cool, Neutral, Warm, Mixed), two process alternatives (Single Tone, Triple Tone).
I would like to start from a peculiar case: the treatment of an image which was born in B&W. Hereunder, three versions of a crop of a picture taken with a Leica Monochrom (with thanks to Daniele Duca for providing the original DNG files). Top, the standard development in Adobe Camera Raw. Middle, the Default development in VitaminBW. Below, the Boost development. You may click on the images to see them at natural size: no resize was performed.
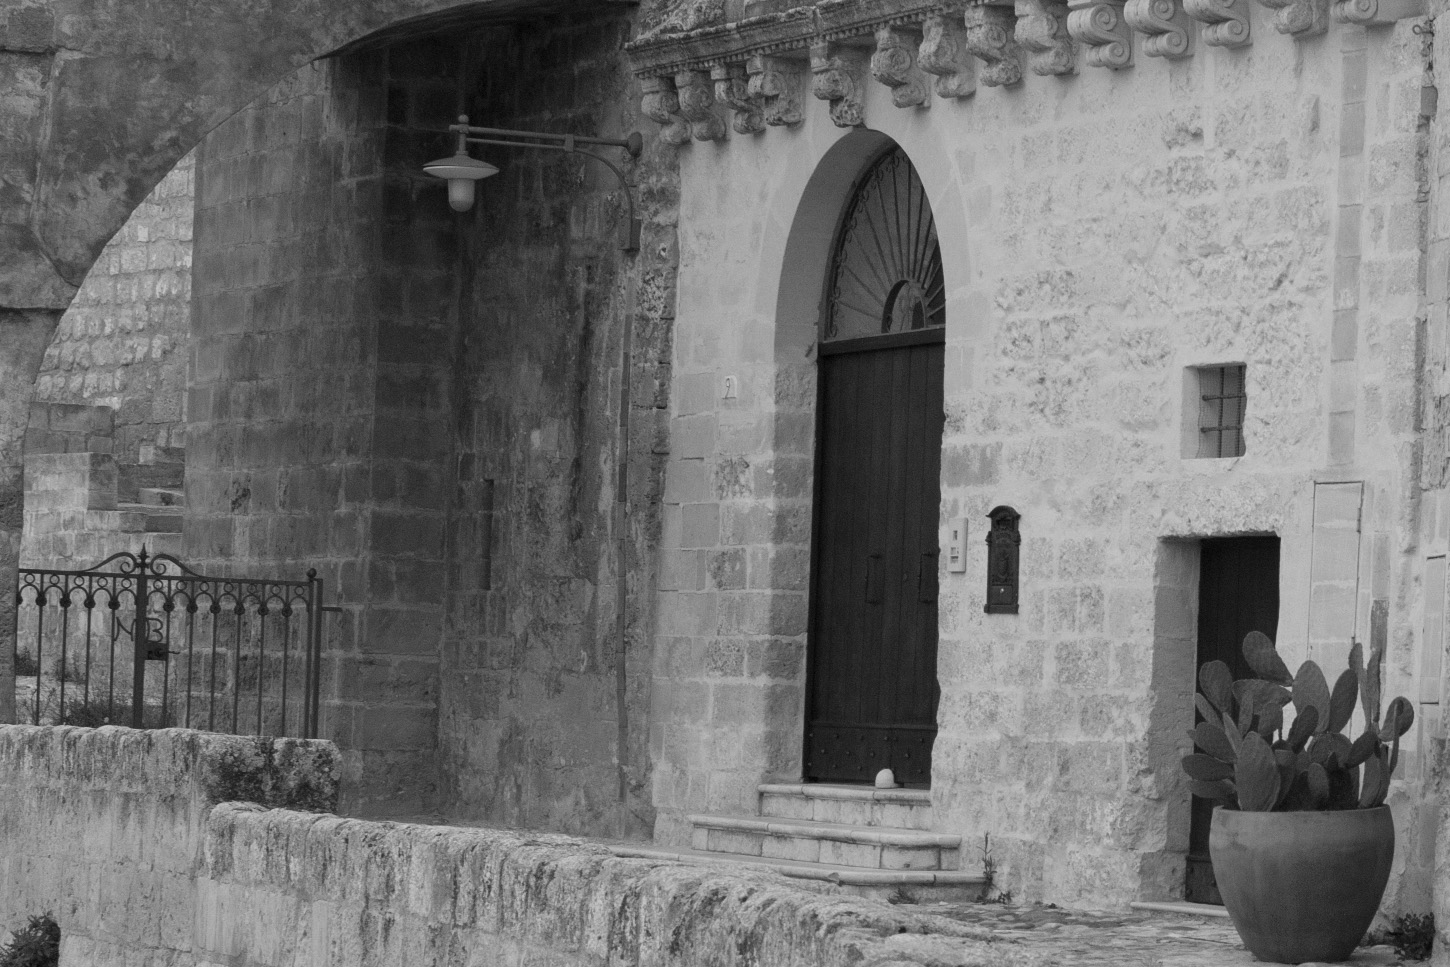
Matera: ACR default development of original Leica Monochrom DNG file.

Matera: previous version with VitaminBW, Default.
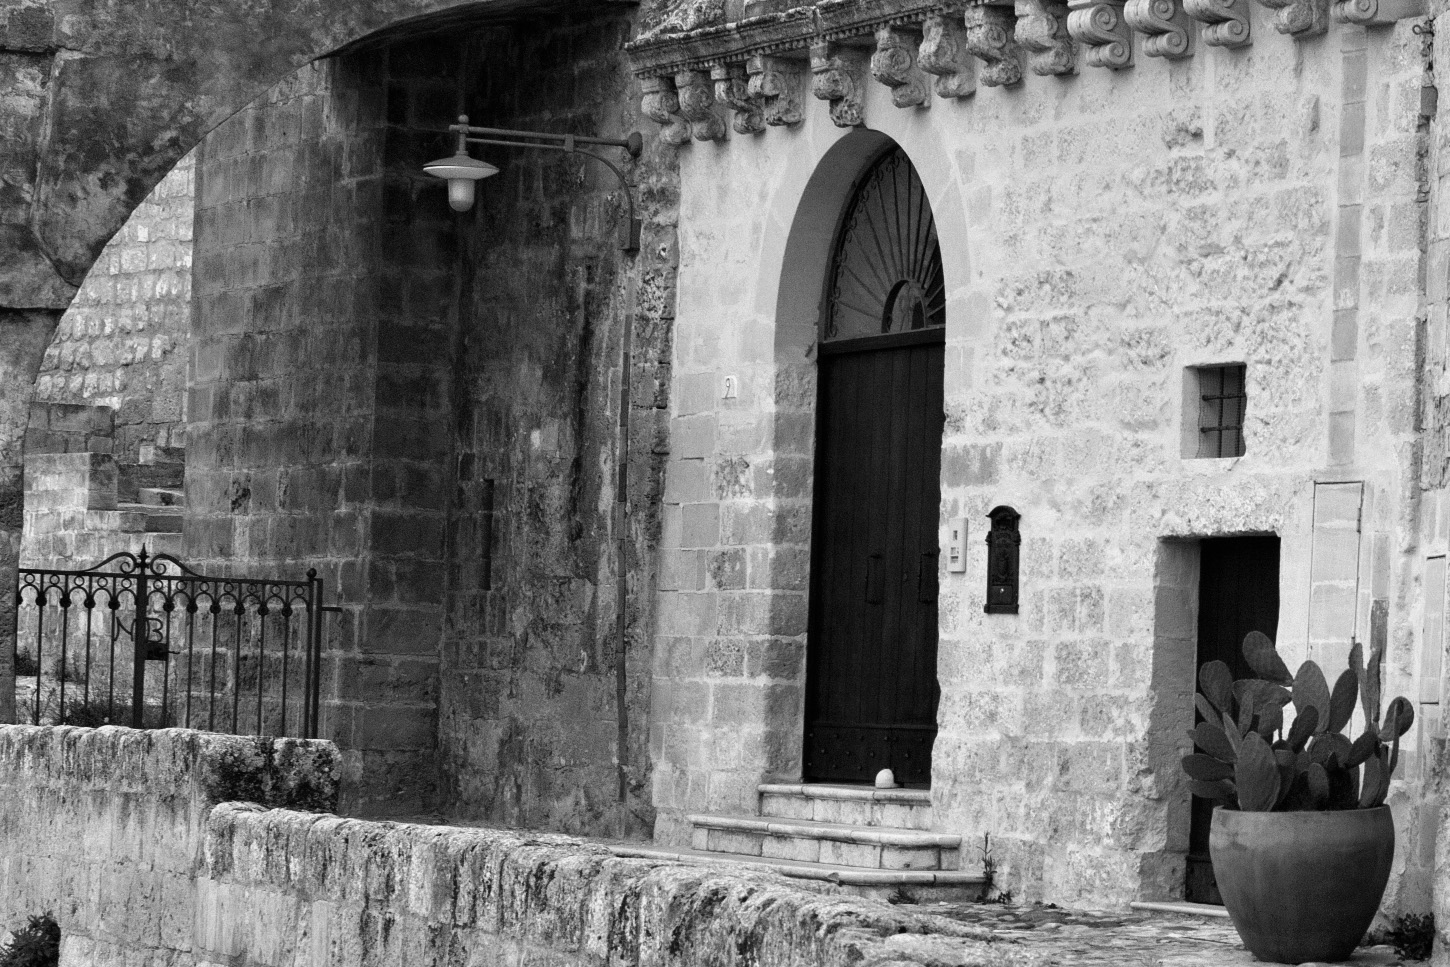
Matera: previous version with VitaminBW, Boost.
Processing a native B&W image clearly shows that the process behind VitaminBW is not based on some mere combination of channels, because they’re identical in the original. It has a lot to do with local contrast, instead. The difference between the default development in ACR, which is tonally rich nevertheless, and the Default VitaminBW version is staggering. The Boost version, instead, adds more depth and apparent detail to its sister based on the Default setting. This can be an alternative or not, depending on the nature and subject of the picture and personal taste. For obvious reasons, the use of colored filter on this image wouldn’t do anything: each version would be identical.
Music changes when we deal with a color image. Eight different versions of a portrait (plus the original) follow. The first B&W version is a straightforward conversion from RGB to Grayscale; the second was obtained with the default parameters of the Gorman-Holbert’s method; the remaining six are versions obtained with VitaminBW.
I suggest to click on the image to inspect it at 100% zoom. My remarks follow, at the end.

Straightforward & Gorman-Holbert’s B&W compared to six VitaminBW versions.
The straightforward conversion from RGB to Grayscale performed in Photoshop is the least interesting, as one may expect. The cocktail which yields this procedure is based on the recipe that luminosity is built through the original’s R, G and B channels. They are mixted in 3-6-1 proportions (approximately): 30% Red, 60% Green, 10% Blue. In a portrait this is not a bad starting point, given that the G channel is almost invariably the one which shows the best range in the skintone.
The Gorman-Holbert’s method is a step forward: very rich, detailed but not as flat as the straightforward version.
VitaminBW is the surprise. The six versions, on the average, are very different from each other due to the filters. The base version, without filters, shows a great tonal range, well-defined but three-dimensional and soft at the same time. In a picture like this one, the yellow filter version is very similar to the one without filters. In the following two (orange and red filters) the skintone becomes progressively lighter, and that is coherent with our expectations. The green filters yields a harder version than the one obtained with the Gorman-Holbert method, but maintains an impressive tonal range. The last one (blue filter) is the most dramatic version, a good starting point in case we want to Draganize our image.
The important thing to consider is that all these versions were obtained with two mouse clicks each: one to choose the filter, one on the Single Tone button. Complete simplicity. Not a reductive simplicity, though. In the next image the Photoshop layer structure produced by Vitamin BW in Single Tone mode can be easily seen.

Green filter, Single Tone: this is the resulting Layers palette.
The color original remains on the Background layer. Two black and white layers are produced: from the bottom, the Flat (base) layer, softer than the layer above. The layer mask visible in the Layers panel is white when created: therefore it reveals the upper layer completely, and this is what you see at the end of the process. In this version I made an elliptic selection and filled it with black to show the tonal difference between the upper layer and the Flat layer. The latter shows less contrast and is useful to make a softer version. One can put this mask to use in may ways: also by painting with a brush in order to mitigate some critical areas in case VitaminBW had a funky go at the contrast in them.
All the versions seen so far have a Neutral toning. There are three more options, though: Cool, Warm and Mixed. The latter is a gentle split toning with warm lights and cool shadows.
The next step is Triple Tone. This mode produces three independent versions: one without filters, one with the orange filter, one with the blue filter. The philosophy behind such choice is clear: depending on the image, some areas will be better, with more detail or more interesting in a certain version. In the following image the layer structure created by VitaminBW can be seen: six layers in total divided in three groups, in addition to the original on the Background layer. Each group has a layer mask. In thisversion, the tiny leaves of the tree were taken from the group which contains the blue filter version (notice the layer color). The orange filter group was made invisible and is not used. The mask, of course, was hand-painted – but nothing prevents from using masks based on the luminosity (direct or inverted) of some channel.

VitaminBW’s generated Layers palette with the Triple Tone option.
I’ve experimented a lot with VitaminBW and I have no doubt about its value and versatility. Two things are missing, though: a preview and automation. In other words, you can’t launch the script from an action. This would allow one to make droplets and batch-process a series of files.
The preview is missing, Davide Barranca explains, for two reasons: it is impossible to compute it in real-time because of the technological limits of the scripting language. The only way would be to compute all the possible variations, which are as many as 48, before showing the dialog box. This is obviously out of the question. The current solution is that the user can choose between two images, a landscape and a portrait, whose results were computed in advance. They are useful to get at least an idea on how the script will treat skintone, sky and so on in our images.
The automation will be developed in the next release, instead: VitaminBW will be capable to work from an action and this is going to be an advantage because the result of a Triple Tone on a large image cannot computed in seconds. The possibility to
automate could make the workflow easier when there are several images which need to be batch-processed.
Apart from this, VitaminBW carries the strong signature we know well, common to the the products conceived and released by the Bigano-Barranca collaboration. They are 100% Italian (and I can’t think of many similar realities, indeed) and they have an absolutely sensible price; most of all, there are vision and coherence behind them, which I highly appreciate.
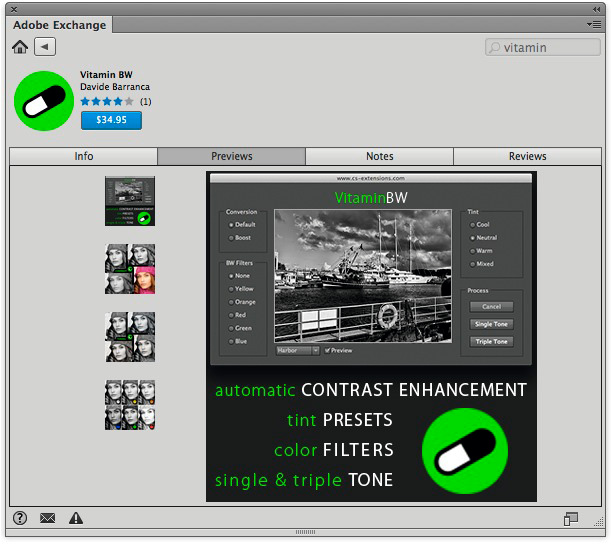
VitaminBW on Adobe Exchange.
If you’re intersted in B&W, I believe your next stop should be this. Or you may buy the script directly from the Adobe Exchange panel. My final observation maybe precedes a possible question: VitaminBW doesn’t suffer any particular restriction with respect to the size of the images it can process. The lack of parameters called “radius” or something similar might lead to believe so. In fact the algorithm adapts itself to the images size by choosing optimized standard parameters. “By photographers, for photographers.”
Happy B&W to all!
MO
Trackback from your site.
Comments (2)
Robin Moyer
| #
Hi Marco,
Is the B&W action compatible with CS4?
Thanks,
Robin
Reply
MO
| #
Robin, I’m afraid it isn’t: it only works from CS6 onward. More details on http://knowhowtransfer.com – the new website which hosts Vitamin BW.
Best regards!
Reply