
The Mask Ghosts Through
I’ve been one poor writer, lately, and I apologize for this. A swarm of workshops and courses took its toll in late spring and I am only starting to take control of my time again. I come back to this blog exactly two months after the last article, hopefully with something you may find interesting.
First, a warning: please do not consider the content of this post as something carved in stone. Rather, take it as a work-in-progress on a sharpening technique that needs to be tested: it may either work or not, but I think it’s worth trying. There is an action available (link at the end of the post) and you’re free and very welcome to comment if you wish.
Let me reveal, first, that the Mask mentioned in the title is the Unsharp Mask. And the reason why it ghosts through is that it comes from a channel which originally doesn’t exist and needs to be built from scratch – although I surmise most of the readers are familiar with it. Let’s start from the beginning.
Long ago and far away
Let’s rewind the tape back to February 2011. That was the month when I and some other well-known friends gathered in Reggello, Tuscany, for the AACT class with Dan Margulis. At the end of the three days I was sitting with Davide Barranca when Dan threw in a seemingly random observation: «do you know how to make a black channel out of RGB?» Er, no, we didn’t. So we were told. Pick any channel you like, duplicate it, and apply the other two in sequence in Screen mode. The result is a very decent imitation of a rather heavy K channel in some imaginary CMYK. Dan called this channel Ersatz Black. I will shorten this to EB from now on.
Fast forward to August 2011. I was in the middle of writing what I consider the most difficult article I ever put together. You can find it in the Help section of the PPW panel under the label H-K. Helmholtz-Kohlrausch, that is. I wrote it after Dan’s request so that the panel could be presented in its fullness at Photoshop World. When I objected that I didn’t know very much about the Helmholtz-Kohlrausch effect I got the reply that I was in good company, because nobody knows that much about the subject. I was daring enough to say that yes, I would try, and set sails for the unknown.
The H-K action in the PPW panel revolves around the EB channel described above. As it often happens, the ramifications of an idea extend far beyond one’s expectations, and at the end of the article the possible use of the EB channel was considered in a number of cases which had little or nothing to do with the H-K action. It was then that an idea slowly started to form.
The Ersatz CMY Madness
Color correction at its best involves some degree of masochism, otherwise we wouldn’t force ourselves to correct color on a screen set to B&W every once in a while. One of the ideas I had since discovering the EB was: «can I produce a working CMYK file entirely from RGB?» This was meant, of course, as an exercise to check how deep my understanding of blend modes was. The rough idea is this: in a generic CMYK separation, the CMY channels are strongly related to their RGB cousins. Basically, with some restraints, they are RGB, but they are lighter when the K channel enters the ring, because K ultimately replaces a certain percentage of C, M and Y. Which percentage exactly depends on a number of factors, like GCR settings and estimated dot gain. All the necessary calculations in a real-world conversion are carried out by Photoshop with very refined algorithms.
In case you’re willing to try, here’s a hint. Start from an RGB image and generate the EB channel as described above. Make a new CMYK document whose dimensions are identical to the RGB image. With Apply image move the RGB channels onto the corresponding channels of the CMYK document: R onto C, G onto M, B onto Y. Finally, move the EB onto K. The image will look awful, so get going with Apply image and Curves in the CMYK monster you’ve created in the attempt to create a reasonable version. The idea is that you should cleverly apply the EB channel onto the Ersatz Cyan, Magenta and Yellow in order to rake away enough ink for the GCR to work properly. After that, curve away to simulate dot gain.
It can be done, but it’s not for the faint-hearted. It takes some understanding of how dot gain works (and a good deal of luck, may I add). The procedure is not identical for each channel due to the weakness of the cyan ink. But in the end, many four-letter words later, you may end up with something which could be presented as a CMYK file proper.
I’ll say it again: file this under “technical masochism”. It is of no use in the real world. No use at all. PERHAPS.
The CMYK Practitioner Knows Better
Sharpening, don’t you love it? Actually, yes – although it can give some serious headaches. Anyone who is used to work in the three main color models, RGB, CMYK and Lab, has a ranking chart mapped out in her head when it comes to sharpening: «Best in CMYK, fine in Lab, weak in RGB.» The reasons for this are well-known, but it is important to stress that in many cases CMYK wins over any other colorspace simply because it has black. The K channel steals the contrast from the CMY channels, and therefore contains detail. It wouldn’t make a good B&W version because of its weird contrast, but when it comes to outlining the interesting parts of the subject it is difficult to beat. Sharpening the K means that 9 times out of 10 the enhancement of contrast will fall exactly where it is needed. End of the process, without further ado.
A common-sense approach suggests that moving an image from RGB to CMYK only for the purpose of sharpening the K would not be a good move. Indeed, it wouldn’t: if you already know your final output will be CMYK, refrain from sharpening in RGB and sharpen the bejesus out of the K channel at the end of the workflow. Otherwise, think it over: gamut may often be a problem, highlights may suffer, and so on. While it’s easy to recover color, if needed, lost detail is another story. So, one had better be careful.
But we would like to be able to sharpen in RGB as we do in CMYK, wouldn’t we? Months and months after my attempts to build a bogus CMYK file from RGB I started thinking about a possible way to do this.
How Far I Fell
I miserably failed a number of times, because I was thinking too much CMYK and too little RGB. On paper, my original idea was viable: let’s build the EB channel and subtract it somehow from each RGB channel. Then apply USM to the EB and add it back into the RGB channels. The idea is that the original channels should look sharper. Indeed, this is what happens, but there’s a problem.
The technique can be immediately applied if we solve a core problem first: «Given any X channel, find a way to apply a Y channel in some blend mode, and then again Y in some other blend mode so that the final result is identical to the original X.» To put it more simply, start from a channel, apply something, then apply (differently) again that something so that the original channel comes back. Notice that the two channels involved must be absolutely generic. This operation should be some sort of identity, and it should work always.
Easier said than done, believe me. The closest I got to a result was by means of the Soft light blend mode. If you have a generic X channel (destination) and a generic Y channel (source), applying an inverted version of Y onto X in Soft light, and then Y onto the result in Soft light will almost give you a result. The image doesn’t explode, but there is a subtle yet definite change of luminosity in some areas. Moreover, the shadows tend to lose depth and detail.
Straightforward subtraction and subsequent addition won’t work because clipping may occur both in the shadows and the highlights. Compressing the tonal range around the midtones and therefore gaining headroom could be an option, but I feel that smashing the original picture with a curve to recover the contrast later would be seen as suspicious even in 16-bit, so I abandoned that way. Aside, my feeling is that the procedure is doomed by the fact that we are forced to work with a finite set of tonal values. If we had infinite headroom the computation would be a breeze – but we don’t. Also, the physicist in me rears its ugly head and hisses “systemic entropy” in my ear. I am not 100% sure this is the problem, but I’d love to investigate it one day.
Yet, give or take a few points in luminosity, the results of Soft light were promising. The idea, of course, was to apply the original EB in the first step, and a sharpened version of the same channel in the second: “subtract” (loose meaning) the EB to “add” the sharpened EB later. Yet, no luck.
What Made The Difference
Finally, the penny dropped. As it often happens, the solution to the problem is far more elegant than the original idea.
We know that sharpening can be obtained in different ways. One of these is a version of the original image treated with a high-pass filter blended with the original in some contrast blend mode: Overlay, Soft light – you name it. So I thought whether I could build a fake high-pass version of the EB channel and apply that to the original image.
Here’s the workflow, step-by-step.
- In a generic RGB file, a new layer called Ersatz Black USM is created and the composite is applied.
- The EB channel is generated (e.g.: duplicated B as base, apply G in Screen mode, apply R in Screen mode).
- A copy of the EB channel is created and named Ersatz Black Sharpened.
- The Unsharp Mask filter is applied to the latter as one would to the K in CMYK.
- By means of the Calculations command, the original EB is subtracted from the sharpened version, with proper parameters (Offset: 128, Scale: 2).
- The newly-created channel is named Ersatz Black USM.
- The channel is applied three times in Soft light to the Ersatz Black USM layer.
- The layer is duplicated and the dark and light halos are split by setting the two copies of the sharpening layer in Darken and Lighten mode, the latter at 50% opacity.
- A group named Ersatz Black USM containing the two layers is created.
- The group layer is set at 50% opacity.
This is exactly what the action does, less some housekeeping. The final sharpening channel is retained and can be found at the bottom of the Channels panel.
The Action + Final Remarks
The action can be downloaded here. It is in .zip format, so you’ll have to unzip it and load it into Photoshop from the menu of the Actions panel. I’ve tested the action on the English and Italian version of Photoshop, and it seems to work seamlessly. If you find anything wrong please let me know.
The most relevant advantage of this approach is that the sharpening happens where the relevant detail lies. Moreover, it is concentrated in dark areas, and we know that we need more sharpening in the shadows than the highlights. I decided to apply the Ersatz Black USM channel three times in order to reinforce the effect: the final result is likely to be too strong, and that’s why the group layer’s opacity is reduced to 50% in the end, but this is very image dependent so one never knows.
The action’s default USM settings are Amount = 500, Radius = 1, Threshold = 0 but it will stop and let you choose your own in case you wish to differ. The following is the result of an application of the action with standard settings: the left part of the image is unsharpened, the right one is treated instead (click to see the 1:1 version).
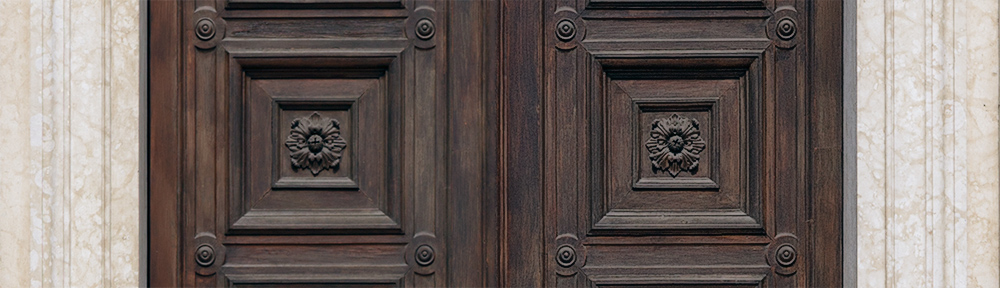
Left: the unsharpened version. Right: the sharpened version.
I have no idea how useful this action may be, but there are cases where it works well. Portraits, for instance, are one of these, and you may often find yourself pushing that opacity slider up towards 100%. An example follows below. In this case the parameters were changed to 500-2-0 while running the action and the opacity of the group layer was left to 50%.
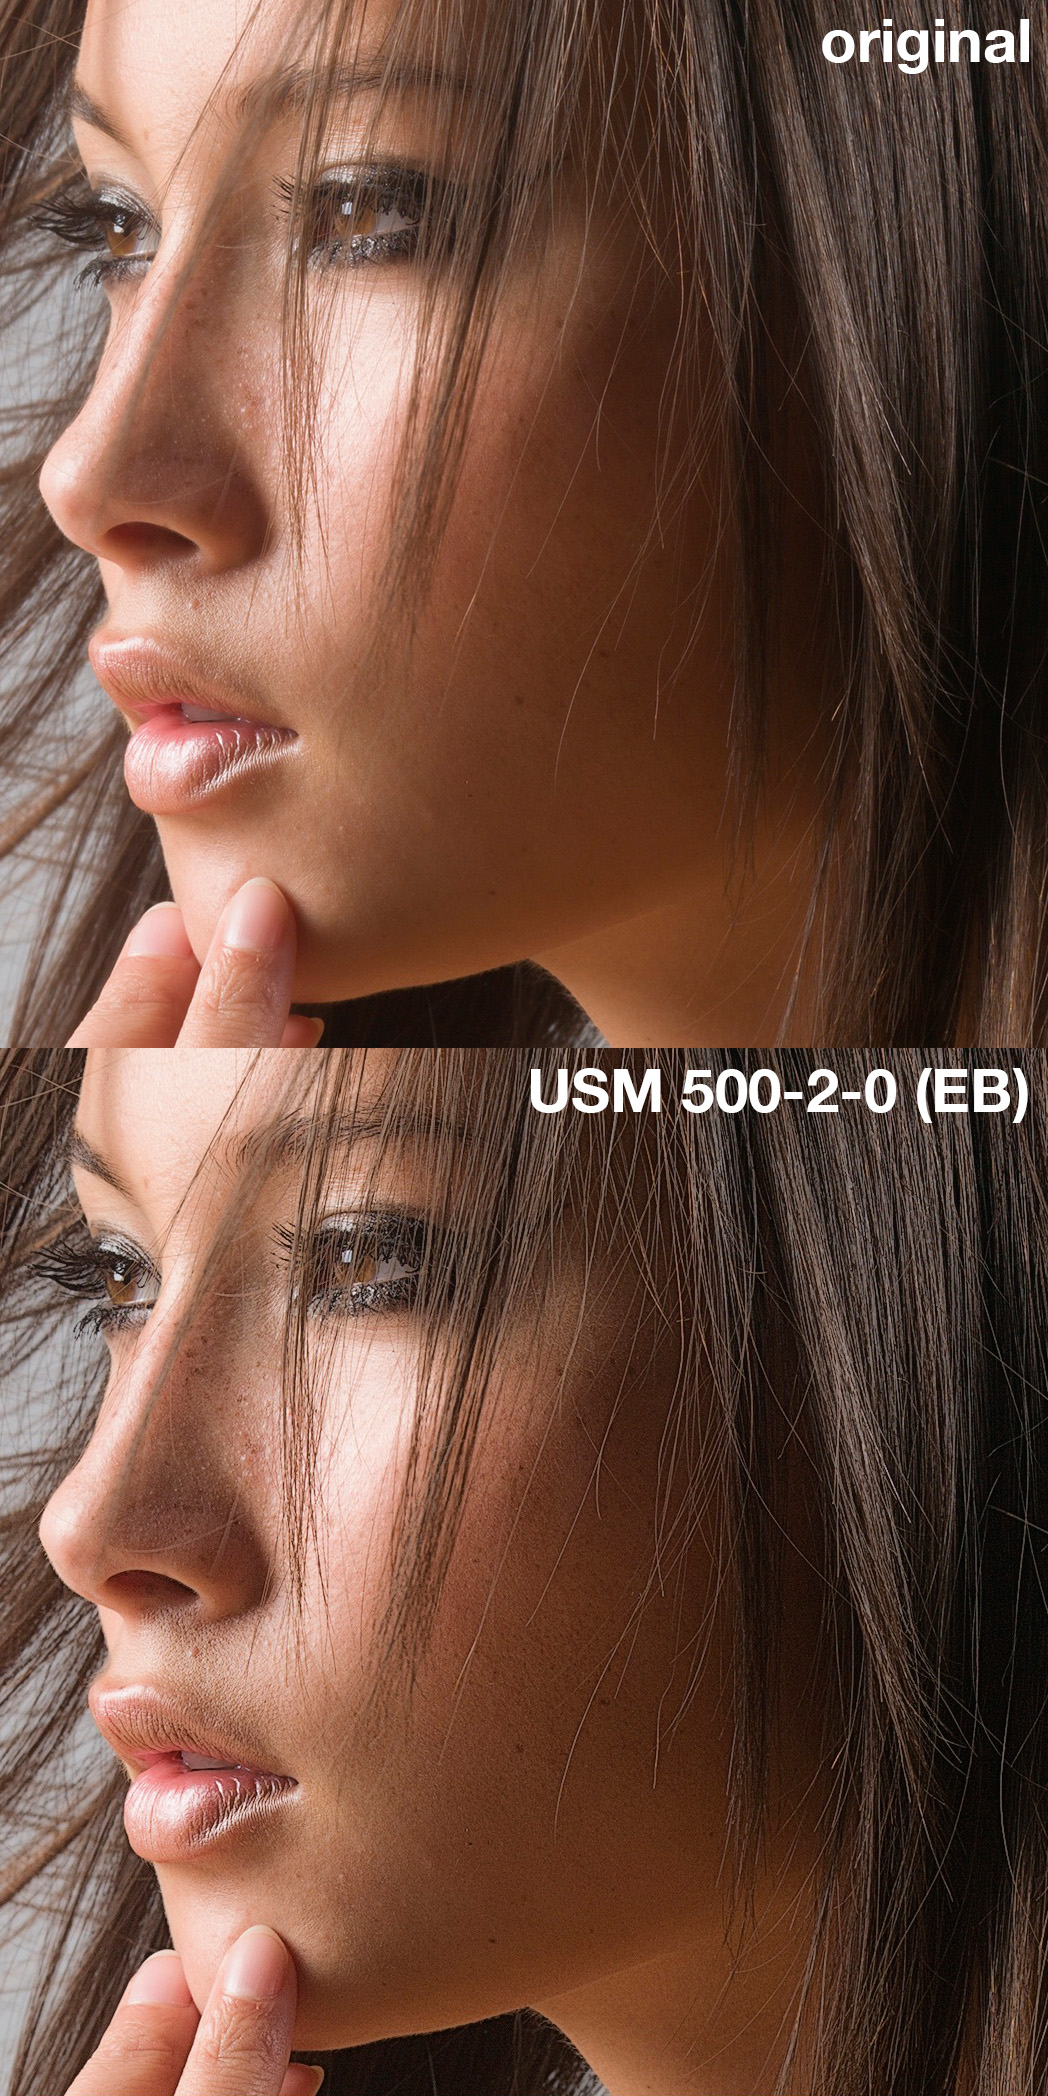
Above: a portrait original (courtesy of Hasselblad). Below: the result of USM 500-2-0 performed with the Ersatz Black USM action. (Click to enlarge.)
I will be glad if anyone is interested to try out the action, and constructive feedback and criticism is more than welcome. Again, please consider this as a step of a work-in-progress which can surely be improved and refined. Also, as far as I know, this technique is not described in any article or post. If someone knows that something similar was published before, I’d like to know so that I may give the necessary credits.
Thanks for your attention!
MO
Tags: blend modes, CMYK, ersatz black, sharpening, USM
Trackback from your site.
Comments (8)
Photoshop | Pearltrees
| #
[…] The Mask Ghosts Through […]
Reply
massimo brando
| #
Very interessing article. It goes far beyond my knowledge but it gives me some ideas on sharpening images for ink jet printing using the RIP’s K channel instead of the Ps’s sharpening mask in RGB mode. Also, a possible way for gaining sharpness with problematic substrates or less than perfect output profiles. I’ll give it a try and let you know ( from the point of view of inkjet printing)
Reply
MO
| #
Massimo, this is a very interesting idea I had never thought about. I’d love to hear about the results in case you decide to experiment – let me know!
Reply
Massimo
| #
Thanks! It looks quite interesting, must try it asap!
Reply
MO
| #
Thank you, Max – let me know how you feel about it when you do.
Reply
Antonio Vitone
| #
Well, I’m just starting to try it: it makes me feel I need to learn more about PS and that doesn’t sound quite wrong at all!
Thanks, Marco.
Reply
George Machen
| #
I’m playing around with:
– USM layer with inverted luminosity mask/Auto Levels
clipped to
– Curves Adjustment Layer (unmodified) with inverted saturation mask/Auto Levels
over
– Background layer
memo:
– Can use Layer Group with saturation layer mask containing USM layer with luminosity layer mask in lieu of the Clipping Group.
– This “full GCR” sharpening can be restricted to “UCR” sharpening with curves to both layers’ layer masks, dragging black point horizontally inward to pass only, e.g., from halftones or from three-quartertones.
– Saturation mask http://bit.ly/1qt8gGf
Reply
MO
| #
Many thanks, George, I’ll look into this as soon as I have time. All the best!
Reply